Much of your team's success hinges on their ability to get back to your customers quickly. Managing your response and resolution times with an SLA is the best way to ensure that your customers aren't kept waiting.
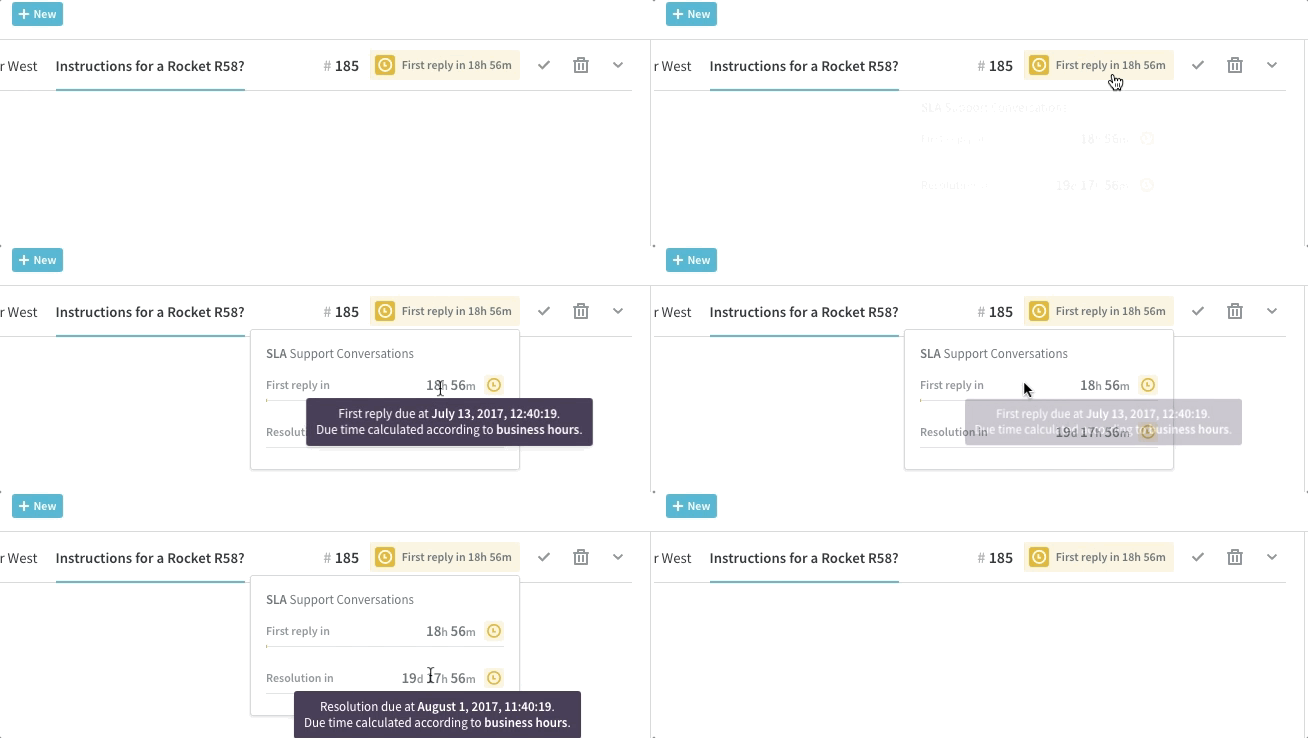
Each SLA establishes and monitors target times for when your team should be responding to and resolving their conversations. Based on an SLA, you can also build automations to escalate any conversations that have breached their targets. For any conversation that is subject to an SLA, you'll see where it's at with its targets in the top toolbar.
In this article, we'll take a quick look at the way SLAs and escalations are defined in Kayako. From there, we'll walk you through customizing your team's targets, and then give you some example automations you can use to escalate overdue conversations.
Understanding how Kayako manages SLAs
Out of the box, Kayako comes with a single default SLA that you can modify to suit your team's benchmarks. You can set targets for each of the following:
- First reply time — The time between when a customer starts a conversation and when your support staff sends their first reply.
- Next reply time — The time between when the customer updates the conversation and your support staff sends their response. This will reset every time your staff updates the conversation.
- Resolution time — The time between when the conversation was created and when it's set to 'Completed'.
You can also customize the timing for different priority levels so your team can keep their focus on your most urgent conversations. If you've set up your team's working hours, you can also tell Kayako to only count your business hours against your SLA targets.
If you are subscribed to the Scale or Enterprise plans, you can also add additional SLAs, customized to apply only to conversations that match the conditions you define. For example, if you have a particularly high-profile client, you can set an SLA with especially tight timeframes to ensure that their conversations get VIP service. On the Growth and Enterprise plans, you can also create multiple sets of business hours, if you have different teams working at different times.
NOTE: If your team needs multiple SLAs or sets of business hours, you can learn more about upgrading your plan, on our pricing page.
Once you have your SLA(s) dialed in, you can build escalations to bring any overdue conversations to the immediate attention of your team. Using monitors, for example, you can keep an eye on your entire queue and notify your team whenever one of their conversations is within two hours of breaching a target. Or you could set up a trigger to take any conversation that breaches a target, bump it up to 'Urgent' priority, and add a 'breached' tag to make them super-easy for your support team to find. Speaking of which, creating views that display conversations that have breached, conversations that are about to breach, or just conversations subject to a specific SLA are all great ways to make it easier to meet your targets.
Now that you have a sense for the moving pieces, let's have a look at the steps involved in defining your own SLAs and escalations.
Defining SLA targets
For each SLA, you can set targets for three different metrics over the lifecycle of a conversation. Different targets can be set for different conversation priorities. You'll also choose whether Kayako will count every hour towards the targets or only the hours that your team is on the clock.
In the example below, we're going expand the default SLA to cover conversations assigned to multiple teams, and tighten the targets up a little bit.
NOTE: To modify SLAs in Kayako, you will need an administrator account with the 'Manage SLAs and business hours' permission.
To establish SLA targets:
- Sign in to Kayako and go to the admin area.
- Choose SLA from the left sidebar.
- To edit the default SLA, hover over 'Standard Support SLA', and click the Edit link that appears.
NOTE: Depending on your plan, you can also create a brand new SLA by clicking the Add new SLA button in the upper-right. - You can edit the SLA Title and Description if you like, but we're going to leave them be for now.
- Let's say that you've recently expanded your support staff and divided them into two teams: 'Support' and 'Maintenance'. You'll see that the 'Support' team's conversations are already included. Click the +Add another condition button.
- From the Select a condition dropdown, select 'Conversations: Team'.
- From the next dropdown, select 'equal to'.
- And from the final dropdown, select 'Maintenance'. This will expand the SLA to cover any conversation assigned to either the support or maintenance team.
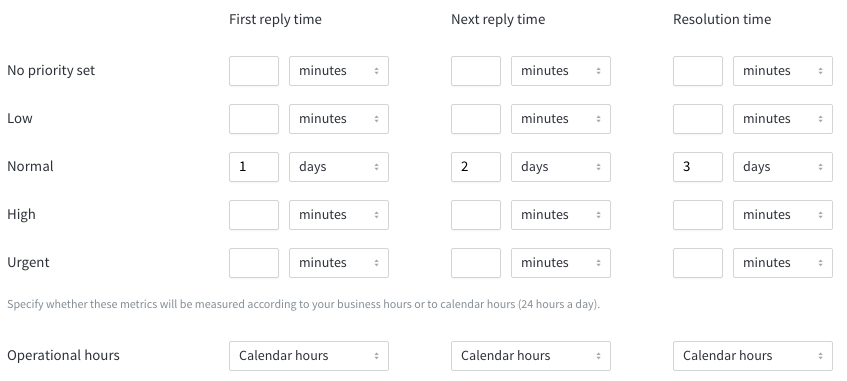
- Under the 'SLA Targets' heading, have a look at the table:
- Let's make our thresholds a little more ambitious. For First reply time for 'Normal' conversations, set the target at '6 hours'.
- For Next reply time on 'Normal' conversations, let's say '12 hours'.
- And let's bump Resolution time up to '2 days'.
- Make any other adjustments you'd like, for other priority levels, and then drop down to the 'Operations hours' section.
- Here, let's set the first dropdown to 'Business hours' so that only the hours that our team is on the clock count against their first reply times.
- Leave the other two at 'Calendar hours'.
- Once you're happy with your changes, click the Save button to update the SLA.
Now that your targets are all set, this is a great time to define some SLA-related views or build some escalations using Kayako's automation engine. Read on for some examples of common escalations automations.
Example escalation automations
You can build escalations using either monitor or trigger automations. Below, we have a couple of examples of common escalations that you might want to recreate for your team.
If you need help with the basics of building automations, check out our instructions on how to create triggers and monitors and our automation reference guide for conditions and actions.
Tagging and increasing the priority of conversations that breach
Description
This automation will be fired every time a conversation breaches an SLA target. It will change the conversation priority to 'Urgent', and tag the conversation as 'breached'.
Definition
- Automation type — Trigger
- Condition(s) — 'SLA: SLA breached'
- Actions — 'Conversation: Priority', 'change', 'Urgent' AND 'Conversation: Tags', 'add', 'breached'
NOTE: For step-by-step instructions for creating this example, refer to our article on creating basic triggers & monitors.
Notifying assignee when conversation is within 2 hours of breach
Description
This automation will run once an hour and send an email to any of your support staff who have conversations that are within 2 hours of breaching their next SLA target.
Definition
- Automation type — Monitor
- Condition(s) — 'SLA: Time to next breach', 'less than or equal to', '2' hours
- Actions — 'Email a user', '(Assignee)', custom content for Subject and Message fields
NOTE: For step-by-step instructions for creating this example, refer to our article on creating basic triggers & monitors.


Kelly O'Brien