You have two options for authenticating your users when they login. You can stick with the standard authentication mode, which checks your users' credentials against a local Kayako database. Alternatively, you can check your users' credentials against a remote database by enabling single sign-on (SSO). SSO lets you use an existing user database to authenticate your agents and customers when they sign in to Kayako.
In this article, we'll walk you through the process of enabling SSO for your customers and your agents.
Turning on SSO for user logins
To enable SSO, you'll need login and logout URLs for your remote authentication service, as well as a secret key that you'll set up to grant Kayako access. For help find these, refer to the SSO implementation instructions over in our developer documentation.
NOTE: To edit your Kayako's SSO settings, you will need an administrator account with the 'Manage system configuration' permission.
To enable SSO authentication:
- Sign in to the admin area.
- Click on Security in the sidebar.
- Choose either the 'Agents' or 'Customers' tab at the top. The configuration options will be the same for both types of user.
- From the Authentication dropdown
list, select 'Single sign-on (JWT)', which will open up another
set of configuration options:
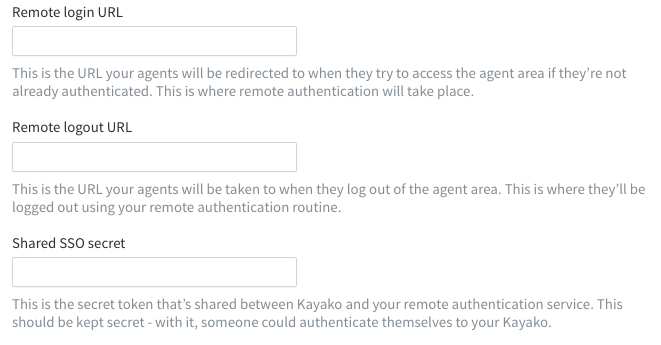
- Add the login URL for your remote system to the Remote login URL field.
- Add the logout URL for your remote system to the Remote logout URL field.
- Paste the token you've created for Kayako into the Shared SSO secret field.
- Click the Save button to save the changes.
NOTE: Remember, if you need more help with configuring SSO authentication, our developer documentation has you covered.
Kelly O'Brien