Email is Kayako's primary support channel. With no setup required, your team can immediately start communicating with your customers using the default Kayako support email address: 'support@yourcompany.kayako.com'.
At any point, you can add more email aliases to your Kayako domain, which you can use for particular teams or types of support conversations. You can also enable Kayako to send and receive messages using addresses at external domains.
In this article, we'll walk through how Kayako handles email support, and then take you step-by-step through setting up and configuring your addresses.
Understanding how Kayako manages email
When you get started with Kayako, you start out with a default support email address – 'support@yourcompany.kayako.com' – which you can start using right away. Any email that arrives at that address is automatically converted into a new conversation or added to an existing conversation. With no setup required, you can start sending and receiving support emails from that address right away.
But what if you want to use different addresses for sales or billing? Or, what if you want to use email addresses from your own domain? With a little setup, Kayako can handle all that, too.
To add multiple email addresses to your Kayako, you have two paths available:
- You can use your @yourcompany.kayako.com domain and spin up as many additional email addresses as you like.
- You can forward emails from your external domain – i.e., support@yourcompany.com – into Kayako, and add them as email channels. This requires a little bit of extra setup, but will let you send and receive messages using your external email addresses from within Kayako.
Let's look at an example of how this might work:
Brewfictus, our favorite imaginary coffee equipment supplier, mostly has three types of conversations with their customers: sales, support, and repairs. They've been handling all of these with separate shared email inboxes at their external domain: @brewfictus.com.
Now that they're moving over to Kayako, they want to consolidate everything. They have two options. Option one: they can add a couple new emails to their Kayako domain and switch everything over to the new addresses, i.e. support@brewfictus.kayako.com, sales@brewfictus.kayako.com, etc.
Or option two: They can keep their external addresses – support@brewifctus.com, sales@brewfictus.com, etc. – and forward them into their default Kayako address: 'support@brewfictus.kayako.com'. Once the forwarding is set up, they can add each address as a new email channel, make a few modifications to protect their messages from spam filters, and they'll be good to go.
Whichever way they choose, their support team will be able to send and receive messages using any of their addresses, directly from the agent area.
Below, we'll go through the steps required for setting up email addresses in Kayako.
Adding email addresses
You can add as many email address at your Kayako domain as you like. All you need to do is type in the new address — e.g. 'sales@yourcompany.kayako.com' — and you'll be all set.
To add an email address at a different domain — e.g. 'support@yourcompany.com' — you'll need to set it to forward to your default support address first, then set up spam protection with SPF and DKIM, and finally follow the instructions below to add the address to your Kayako.
NOTE: To add email addresses in Kayako, you will need an administrator account with the 'Manage channels' permission.
To add a new email address:
- Sign into Kayako and go to the to the admin area.
- Under the 'Channels' heading, click the Email link. Here you'll see a list of email addresses that have already been added to Kayako.
- Click the New address button to add another address.
NOTE: Remember, if you're adding an external email address, you'll need to set it to forward to your default Kayako address, 'support@yourcompany.kayako.com'. - In the Address field, enter the email you want to send or receive from.
- From the Brands dropdown, you can select which brand the email address is associated with.
NOTE: To learn more, check out our user guide article about managing multiple brands. - Click the Save button to add your new address.
Managing email addresses
Once you've added your email addresses, you may need change which addresses are enabled or disabled, or configure some site-wide email settings.
To manage your email addresses:
- Sign in to Kayako and go to the admin area.
- Under the 'Channels' heading, click the Email link. Here you'll see a list of email addresses that have already been added to Kayako.
- If you hover over an email address, you'll see several links pop up to the right:
- Edit — Click this link to make changes to the email address.
- Disable — Click this link to disable the email address, without removing it from Kayako.
- Make default — Click this link to select the email address as your default, when replying to conversations.
- Delete — Click this link to remove the email address altogether.
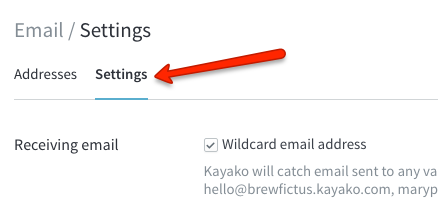
- To configure your site-wide email settings, click the Settings link on the menu bar.
- Here, you have a handful of options:
- Wildcard email addresses — Check this box to tell Kayako to capture emails from any address at your Kayako domain, ' yourcompany.kayako.com'. Checking this option will ensure that you don't miss any incoming messages, but you can always add specific Kayako addresses later, so your team can send messages from them.
- Personalize the ‘from’ in email replies — Check this box to add your agents' names to the emails you send from Kayako. The emails will still come from whatever email address they select, but the agent's name will be added to the 'From' field.
- Use DKIM to authenticate... — Once you have DKIM set up on your email server — check out this article for details on that — you'll want to come back here and check this box, to enable DKIM for your Kayako emails.
- When you've made your changes, click the Save button to head back to the mail 'Email' page.
Kelly O'Brien