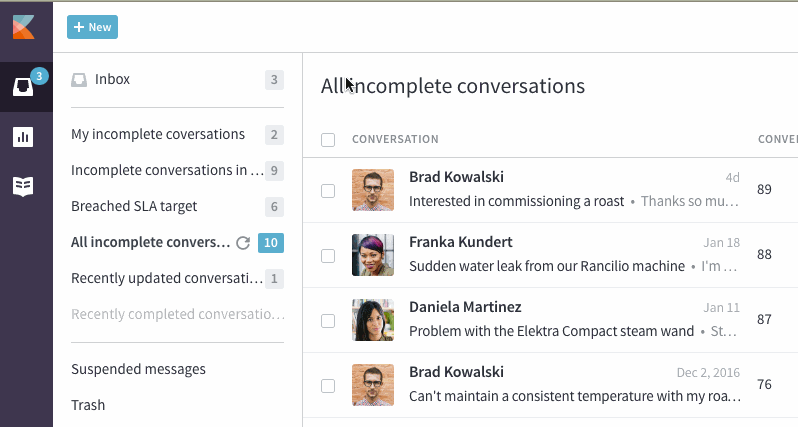
If you provide support for businesses, you'll often end up talking to more than one person at the same company. To give you a clear view of what a particular company is struggling with, it's important to be able to look at all the conversations your team has had with everyone at that company. In Kayako, you'll do this with organizations.
Organizations group users together, so you can view all of their conversations, activities, and events in a single timeline. Kayako automatically creates organizations that use unique email domains, like 'kayako.com', but you can also create and manage organizations manually.
In this article we'll take you through how organizations work in Kayako, and then walk step-by-step through creating and editing organizations, as well as managing their membership.
Understanding how organizations work
Organizations provide your support team valuable context for individual conversations. With organizations set up, support staff can switch easily between an individual conversation and the organization timeline. The timeline displays all recent interactions with the organization, including conversation updates, views of Help Center articles, customer support ratings, contract renewals, online purchases... you name it.
To get a clear picture of how organizations work in Kayako, let's look at an example:
Take Brewfictus, a (fictional) company that supplies coffee equipment for coffeeshops around the world. Their support team takes care of their many coffeeshop clients, some large and some small. Brewfictus will want to have an organization set up in Kayako for each of their clients.
For a large client, like (the also fictional) Front Range Espresso, Kayako automatically creates an organization the first time someone with an 'frontrangeespresso.com' email address contacts support. After that, any user with an 'frontrangeespresso.com' email address is automatically added to the Front Range Espresso organization.
Meanwhile, one of Brewfictus' smaller clients, the independent (and imaginary) Rainbow City Cafe, has their staff using gmail. For them, the Brewfictus support team manually creates a new organization, to which they can add any Rainbow City employees that contact them.
Setting up organizations for each of its clients gives the Brewfictus support team valuable context. Whenever they look at a conversation from Front Range, they can easily switch to the organization timeline to see all recent activity from Front Range users.
That's just the basics, though. Setting up organizations gives support teams a lot of other interesting options:
- Manage visibility — You can allow users to see every conversation in their organization. This means that, for example, Front Range's regional manager could sign in to the Brewfictus Help Center and view any conversation that his employees have submitted.
- Tags and custom fields — You can use tags and custom organization fields at the organization level to make it easier to manage your workload. Let's say Rainbow City Cafe is owned by the Brewfictus CEO's mother-in-law. Brewfictus can add a 'VIP' tag to the Rainbow City organization so that any conversation that comes in from them is subject to the SLA they've set up for VIP clients.
- Centralized annotations — In addition to the automatic timeline entries that track conversation updates and other user activity, you can also add notes to an organization manually. So if one of your support agents hears that Front Range is about to expand into a new market, they can share that insight with a note on the organization page.
Now that you have a clearer picture of how organizations can be used, let's look at nuts and bolts of actually creating and customizing them.
Manually creating organizations
Many organizations are automatically created from customers' email domains. For customers that use more generic email addresses, though, you'll need to add an organization manually.
NOTE: To add organizations in Kayako, you will need an agent or administrator account with the 'Create and update users and organizations' permission.
To create an organization manually:
- Sign in to the agent area of Kayako.
- Hover over the + icon on the top bar, and choose Organization.
- In the Organization name field, enter the company's name. For an example, let's use a Brewfictus client, and name this 'Front Range Espresso.'
- In the Domain(s) field, you have an option to add an email domain, without an '@' symbol. So for example, we'd type in 'frontrangeespresso.com'.
NOTE: You can add multiple domains for a company, as well. Just type one, hit enter, type the next, hit enter, etc. - That's all you need to get started. Click Add organization to create your new organization.
- From here, you'll want to go fill in some more details on the company, which we'll cover below.
Editing organizations
Once an organization has been created – either by your team or automatically by Kayako – you can fill in some additional organizational information. There are a handful of built-in system fields that each organization comes with, but you may also want to add some custom organization fields to round out the information your team tracks.
NOTE: To edit organizations in Kayako, you will need an agent or administrator account with the 'Create and update users and organizations' permission.
To edit an organization:
- Sign in to the agent area of Kayako.
- In the search bar, type the name of the organization you want to edit.
- Click on the organization from the search results to open it up.
- If the organization was created automatically, the title might need some cleaning up, which you can do by hovering over it and clicking to edit.
- At the top of the sidebar, you'll see the Tags field. You can enter tags here that will also be added to any user and conversation that belongs to the organization.
- In the Email domains field you can add or remove emails domains. Any user with an email address from one of these domains will be automatically added to the organization.
- From the Conversation Access field, you have two choices:
- 'Can see each others' conversations' – Select this to enable users in this organization to see all conversations submitted by their organization.
- 'Cannot see each others' conversations' – Select this to limit users visibility to their own conversations.
NOTE: You can control this on a user by user basis, as well. See below for details.
- If you've created any custom organization fields, they'll appear on the sidebar next.
NOTE: To learn more, check out our user guide article about creating custom fields. - Finally, if you'd like to add a note to the organization timeline, which will be visible by other members of the support team, hit the Click to leave a note link and type your message.
- When you're done making changes, click the Submit button.
That's it, your organization is up-to-date! A good next step might be to set up some automations to control the flow of conversations for specific organizations. You can also read on for some tips on managing organization members.
Controlling organization membership
Organizations aren't much good if they don't have any users in them. Kayako will automatically add users to organizations based on their email domain, but you'll often need to manually add users as well. You can also use this opportunity to set the user's access to their organization's conversations.
To control users' organization membership:
- Sign in to the agent area of Kayako.
- In the search bar, type the name of the customer user account you want to edit.
- Click on the customer from the search results to go to their user journey.
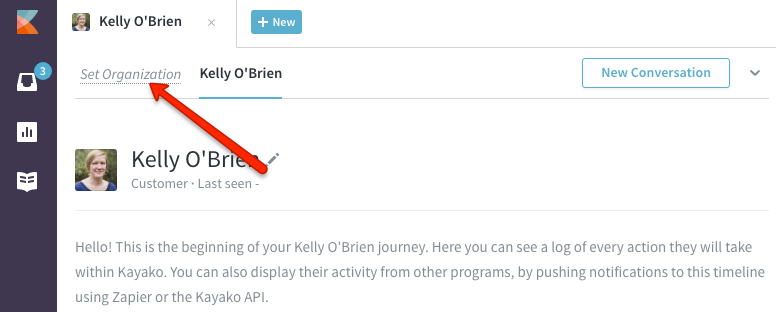
- On the top bar, click the Set Organization link.
- Start typing the name of the organization until it appears in the search results.
- Click the organization name to add the user to it.
NOTE: Users can only belong to one organization. - Next, find the Conversation Access field on the sidebar and choose from two options:
- 'All organization's conversations' – Select this to enable the user to see all conversations submitted by their organization.
- 'Only requested conversations' – Select this to restrict the user's access to only their own conversations.
NOTE: You'll need to be on the Scale plan to enable the 'All organization's conversations' option.
- When you're done, click the Submit button to save your changes.
Kelly O'Brien