Whether you're the director of support, an agent on the support team, or a customer — if you're using Kayako, you'll need a user account. Once a user account has been created, Kayako will be able to keep track of that user's preferences, conversations, and activity. Before you can start using Kayako to provide great customer support, you'll first need to get your team and your customers set up with user accounts.
In this article we'll give you a quick rundown of how user accounts work in Kayako, and then get into the specifics of adding accounts for your staff, and manually creating accounts for customers.
Understanding how user accounts work
User accounts are one of the most fundamental structures in Kayako, and they all possess the same basic attributes. Every user account — staff and customer alike — will have:
-
A user role — The user role determines what kind of access the user has within Kayako. For example, the customer user role limits their access to just the Help Center, whereas the agent and admin roles can see and use Kayako's agent and admin areas. In addition to customer, agent, and admin roles, you can also make user accounts for collaborators, or, if you're on the enterprise plan, you can define custom roles.
Learn more about user roles and the permissions associated with them.
-
An affiliation with a team or organization — In order to put your users in the right context, you'll group them into teams and organizations. Teams are used to organize your staff into functional groups so you can route conversations to the agents who can best address them. Organizations are used to group your customers according to the companies they work for.
Learn more about adding staff users to teams and customers to organizations.
-
A user profile on the Help Center — Every user has a profile that they can view and edit. You can access your user profile from the Help Center whenever you're logged in by clicking on the dropdown next to your name. From here, any user can upload a profile picture, add contact information, link to their social media accounts, and set their timezone and language preferences. By creating custom user fields and making them visible to your customers, you can add more detail to these user profiles at any time.
-
A user page in the agent area — You can find any Kayako user in the agent area by typing their name into to the search bar. When you select a user from your search results, it will open their user page in a new tab. On the user page you can view their timeline, as well as edit their account details, like their user role, their email address and social media identities, their organization or team memberships, and more. Any custom user fields you create will also show up here.
So, those are the basic elements at play with Kayako user accounts. Now let's have a look at how they're actually created.
For staff, you'll need to create accounts for everybody from the Team Directory page in the admin area. To make it easier to get your team set up quickly, you can add multiple users at once. You'll fill in their name and email, and then select a role and a team. The Team Directory page also gives you an easy way to view your whole staff and their team memberships at a glance.
For customers, Kayako will automatically create a new account for them, the first time they reach out to your support team. The automatically created accounts will have pretty limited information — usually just their name and whatever email or social media account they reached out from. But once their account exists, you can go in and round it out from the agent area. All that said, there are times when you'll need to create a customer account manually, in order to open a new conversation on their behalf. You'll be able to do that quickly, from the agent area.
We'll go through the process of creating staff and customer user accounts in detail, below.
NOTE: If you need help creating new collaborator accounts, refer to our article on using collaborators.
Creating user accounts for your staff
Setting up your team in Kayako is one of your first tasks when getting started. To make it as fast and easy as possible, we built the Team Directory page in the admin area, where you can review the accounts you've already created, quickly enable or disable users, and, most critically, add accounts for everyone on your staff. Let's have a look at how to do that.
NOTE: To create new staff user accounts in Kayako, you will need an administrator account with the following permissions: 'Create and update users and organizations', 'Manage teams', 'Manage roles and permissions'. In addition, you'll need to purchase a seat in your subscription plan for each agent or administrator user you create.
To add user accounts for your staff:
- Sign in to Kayako and go to the admin area.
- If it doesn't open automatically, click the Team directory link on the sidebar.
- Here you'll see a list of any non-customer user account that's already been created in your Kayako. Click the Invite team members button in the upper-right.
- In the 'Add new team members' window, fill out the Name and Email fields with your staff member's details.
- From the Role dropdown, select the user role they should have.
NOTE: For help choosing a role, refer to our article on user roles and permissions. - Click the Teams field and select a team for the user. You can add users to multiple teams.
NOTE: If you need help creating teams, refer to our user guide article on the subject. - If you're only adding one staff account, you can click the Save button.
- If you're adding multiple accounts, though, click the + Add a new team member link and repeat the process above.
- Add as many accounts as you like, and then click the Save button to create the new accounts.
- Back on the 'Team Directory' page, you'll see your new account(s) in the 'Disabled' section of the list. Click on the Open link that appears when you hover over the account to go to their user page in the agent area.
- When you're ready to enable the account, click the down arrow on the toolbar, and click Enable user button:
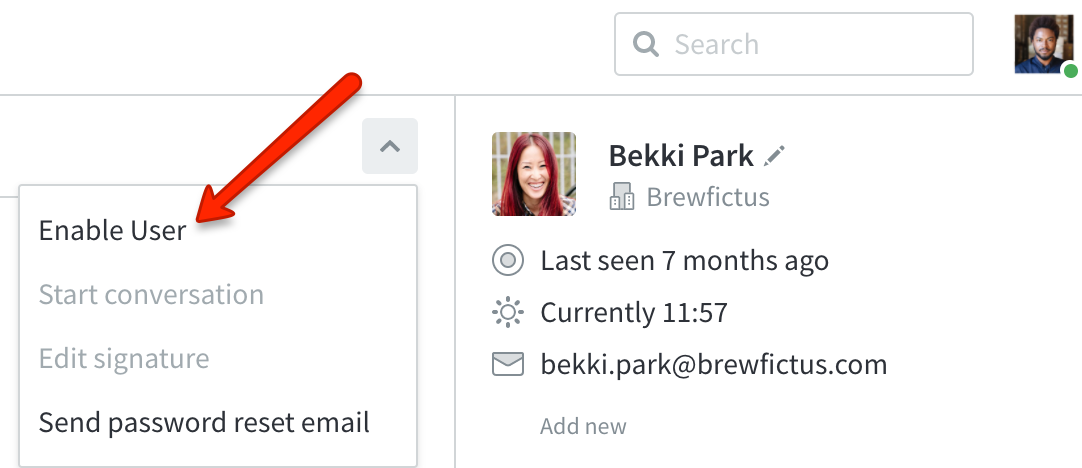
And you're all set! Kayako will send an email to the staff member so they can verify their address and set a password for their account. Then they'll be ready to sign in and starting using Kayako.
Manually creating customer user accounts
The first time someone contacts your support team via the Help Center, email, Twitter, Facebook, etc., Kayako will automatically create a customer user account for them. They'll be prompted to set their own password and sign into the Help Center. But there are some situations where you'll need to add an account for a new or potential customer, so that you can open a conversation on their behalf. We'll walk through that process, below.
NOTE: To create new customer user accounts in Kayako, you will need an agent account with the 'Create and update users and organizations' permission.
To create a new customer user account:
- Sign in to Kayako and go to the agent area.
- Hover over the + button on the top toolbar, and click User.
- Type their full name in the First and last name field.
- Add their email to the Email address field.
- Click the Add user button, which will take you to the user page where you can add details to the customer's profile.
- In the Organization, select the organization they belong to.
NOTE: If their email address is from their company's domain, Kayako will automatically add them to the appropriate organization. - Next, you can select the user's local time from the Timezone field, to localize the timestamps they see when working in Kayako.
- Fill in additional details as needed, and then click the Submit button to save your changes.
And that's it — your customer will get an email asking them to verify their account and set up a password. Once they have, they can sign in to the Help Center and track their open conversations or edit their user profile.
Disabling user accounts
From time to time, you might need to shut down a user account, without removing them or their conversations permanently. For these situations, Kayako's 'Disable user' feature comes in handy.
NOTE: To disable user accounts in Kayako, you will need an administrator account with the 'Create and update users and organizations' permission.
To disable a user:
- Sign in to the agent area.
- Search for the user you want to disable.
- From the user menu, click Disable user.
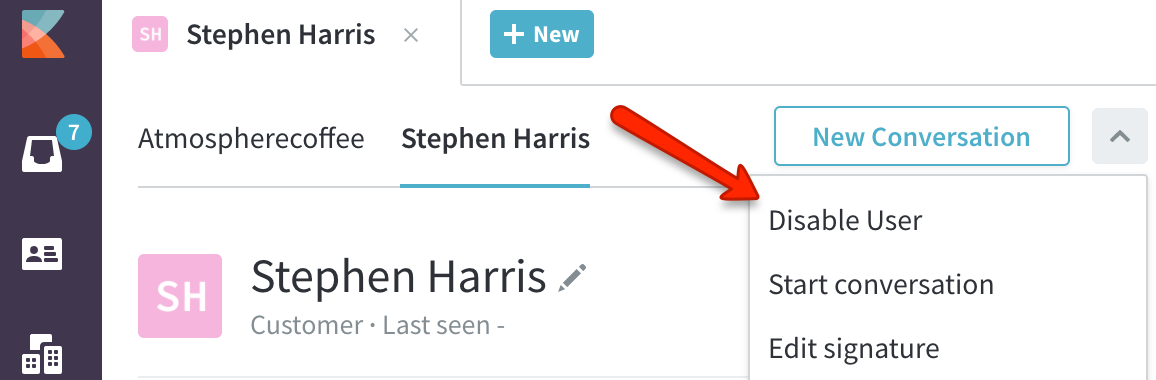
And that's it. You can reenable their account at any point, by opening the same menu and clicking Enable user.
Kelly O'Brien