No matter where your customers need support – and no matter when they come looking for it – Kayako Messenger makes it easy for you to deliver a great real-time support experience. With Messenger enabled, customers can come to your Help Center, website, or app, click the Messenger icon, and start interacting with your support team immediately.
When your team is online, they'll be able to talk to customers in real time, right from the agent area. When they're offline, Messenger will capture the customer's messages in a new conversation, and let them know when they can expect someone to get back to them. You can also customize Messenger by giving it a look that matches your branding, adding apps for recent Help Center articles and tweets, and displaying it wherever your customers need it most.
In this article, we'll look at how your team can use Messenger to provide an exceptional real-time support experience. Below, we'll talk about how Messenger works, and then go step-by-step through getting it configured the way you want it. We'll also walk through how to get Messenger running on your Help Center, website, or app.
Understanding how Messenger works
Before enabling Messenger, you'll have the chance to customize how it will appear to your customers. You can edit the welcome text, set a color scheme, and select what information you want to include on Messenger's home screen. You'll be able to choose from apps that:
- display which agents are or were recently online
- show the three most recently published articles in a particular Help Center section
- share up to three recent tweets from a Twitter account that you've connected to Kayako
Once you have all of your customizations dialed in, you'll have options for where you want Messenger to appear. You can publish your customized Messenger to your Help Center at the push of a button. To add Messenger to an external site or app, Kayako will generate a customized embed code that you can drop into the code for your site or app.
Once you've enabled Messenger somewhere, your customers will see the icon appear in the lower right corner.
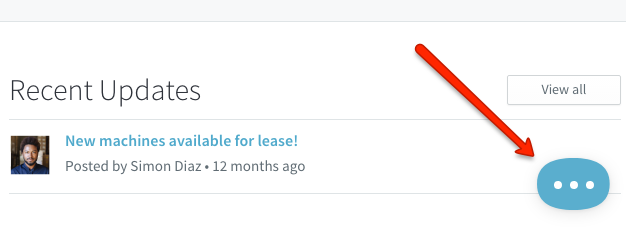
Any visitor to the site will be able to click the icon and start interacting with Messenger right away. For a visitor that's not logged in, that interaction will look like this:
NOTE: A logged in user will see almost the same thing – Messenger just won't ask for their email.
When a new Messenger conversation comes in, your team will be able to pick it up in the agent area like any other message. Looking at the conversation, your team will be able to see whether the customer is online, when they're typing, and whether they've read the agent's messages.
If an agent picks up a conversation when the customer is still online, they'll be able to have a real-time conversation right then and there. If the customer leaves Messenger and an agent's message goes unseen for 15 minutes, Kayako will automatically send it along to the customer's email.
Messenger helps set customer expectations for when they'll get a response from your team. At the top of each conversation, they'll see a response time indicator.
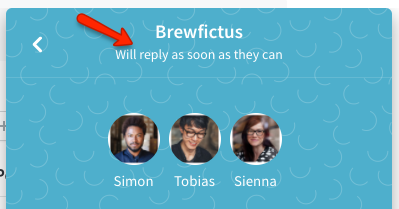
This message will vary depending whether the customer is contacting you during business hours. Outside of your business hours, Messenger will display a 'Will reply as soon as they can' message. Inside your business hours, Messenger's behavior will be determined by which of the following options you select during configuration:
- Smart response time
NOTE: This option calculates and displays your teams' average response time within the business hours you've selected. - Typically replies in a few hours
- Typically replies in a few minutes
- Will reply as soon as they can
Aside from that, Messenger conversations work the same as any other conversation in Kayako. You can send emoji, images, and files. Your team can assign, tag, and automate them. You can also build custom views or integrations to make sure your team can stay proactive about responding to Messenger conversations first.
NOTE: We're also working on adding a notification center to the agent area, to make it even easier for your team to stay on top of new conversations and messages.
Now that you've got a sense for how Messenger runs, let's go step-by-step through the setup process.
Customizing and enabling Kayako Messenger
In order to enable real-time support with Messenger, you'll first need to customize its look and the information it displays. Saving your configuration will update Messenger on your Help Center and anywhere you add the Messenger embed code.
NOTE: To enable Kayako Messenger, you will need an administrator account with the 'Manage channels' permission.
To customize and enable Messenger:
- Sign in and go to the admin area.
- Click Configure, under the 'Messenger' heading in the sidebar.
- If you're using multiple brands, select a Brand for this Messenger configuration, and click Next.
NOTE: If you only have a single brand, you won't see this step. - Set your text for the Home screen title, which appears at the top of the window.
NOTE: You'll be able to see how your changes will look in the preview to the right - Next, add some Home Screen welcome text to appear below the greeting.
- Now for the fun part – choose a Color or Gradient to bring your Messenger in line with your branding.
- You can select a Background texture to add a little personality as well.
- Click the color swatch and choose a Primary color for the Messenger button and headings.
HINT: If you go out to the Help Center and open the 'Customize' panel, you can copy and paste the code for the primary color you use there. - Hit the Next button to head to the 'Apps' tab.
- Here, you have your pick of a few different apps for the Messenger home screen:
- Recently active teammates – displays avatars and names for agents who have recently been online
- Help Center articles – shows the 3 most recent articles from whichever section you choose
- Recent tweets – displays the most recent tweets from a connected twitter account
- Once you've chosen your apps, hit the Next button.
- On the 'Options' tab, first select a set of Business Hours for Messenger to pay attention to.
- Then, from Response time, select which expectation you want Messenger to set with your customers.
NOTE: The response time message will only be displayed within business hours. - Click the Save configuration button. This will update Messenger on your Help Center, as well as anywhere you've added the Messenger embed code.
NOTE: If you ever need to turn Messenger on/off for your Help Center, you'll find a toggle for it under 'Settings' in the 'Customize' panel. - On the 'Embed code' tab, you can select everything in the Embed code box, copy it, and paste it into your website or app. You or your dev team will need to add it right above the
</body>tag, wherever you want Messenger to appear. - To explore your options for adding Messenger to a mobile app, click the Check out the SDKs button.
And that's it! At any point you can come back to the admin area and update your Messenger configuration. Clicking the Save Configuration button on the 'Options' tab will automatically update Messenger wherever you have it published.
Kelly O'Brien